How did I build this concept car?
In 2016, I had the opportunity to work with several companies and carry out various small projects. At some point, I decided that I would like to do “something my”. During my studies, we have built the car models in special model clay. They were models on a scale of 1: 4, i.e. those that perfectly reflect the style, but are not too big. I thought it was necessary to take a step forward and build a model of real size.
August 2016
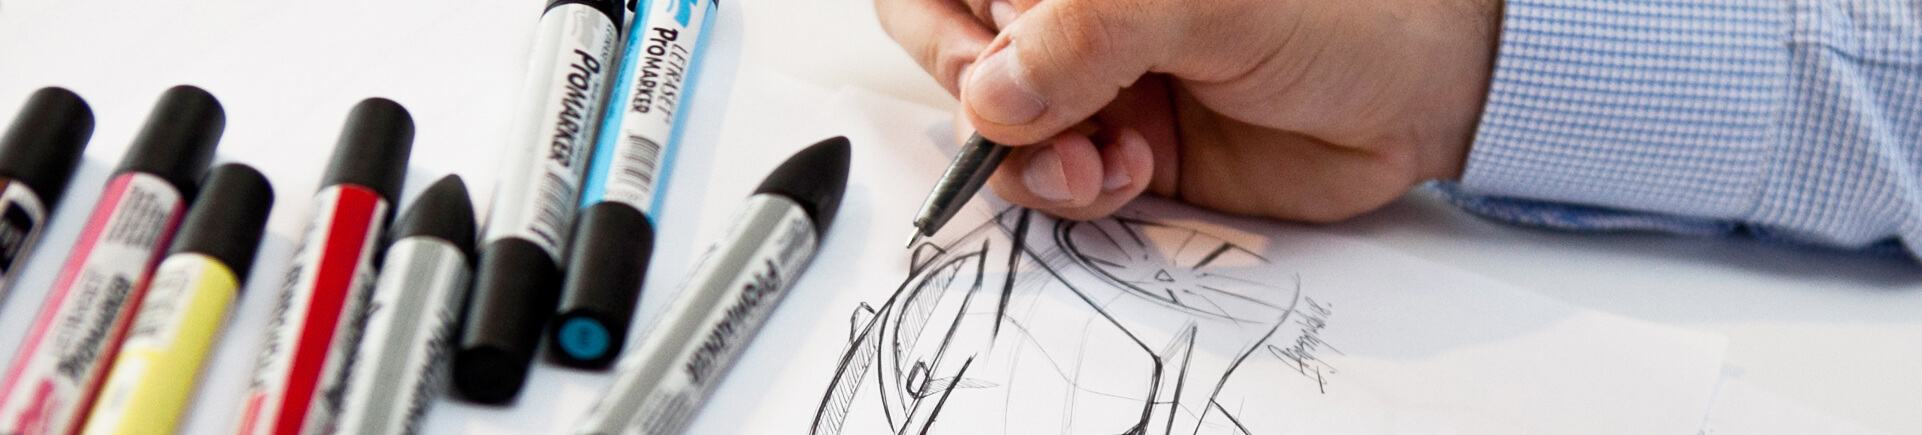
During one of my car trips, I came up with the idea that drones can be an interesting inspiration to create a modern form of a car. Within a few days I started to draw my ideas. First, the form of a drone with 4 rotors was crystallized, the design of which was transferred to the form of a car. The first sketches I always make with pencils or a pen and then I make drawings in Photoshop.
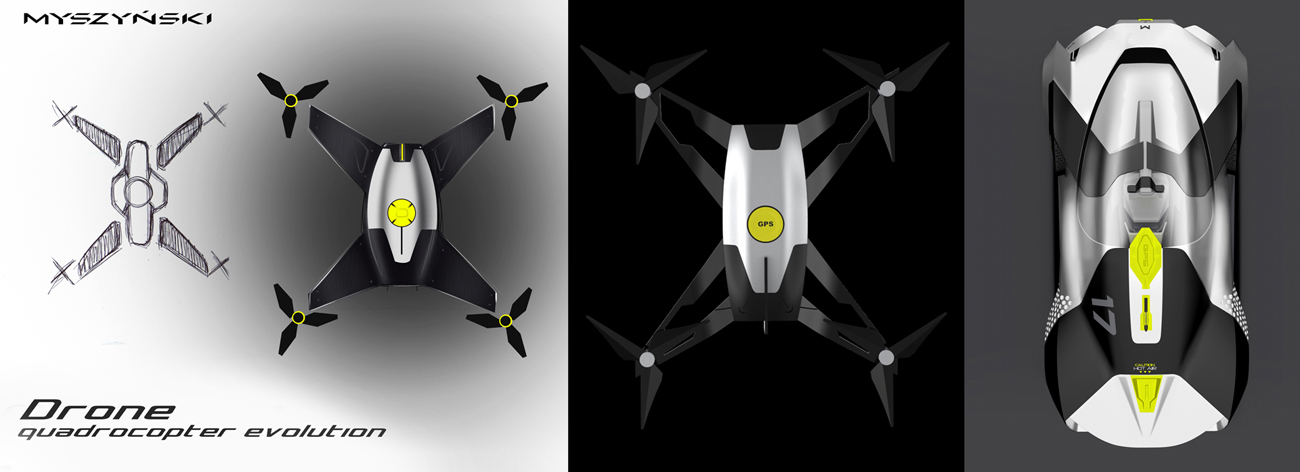
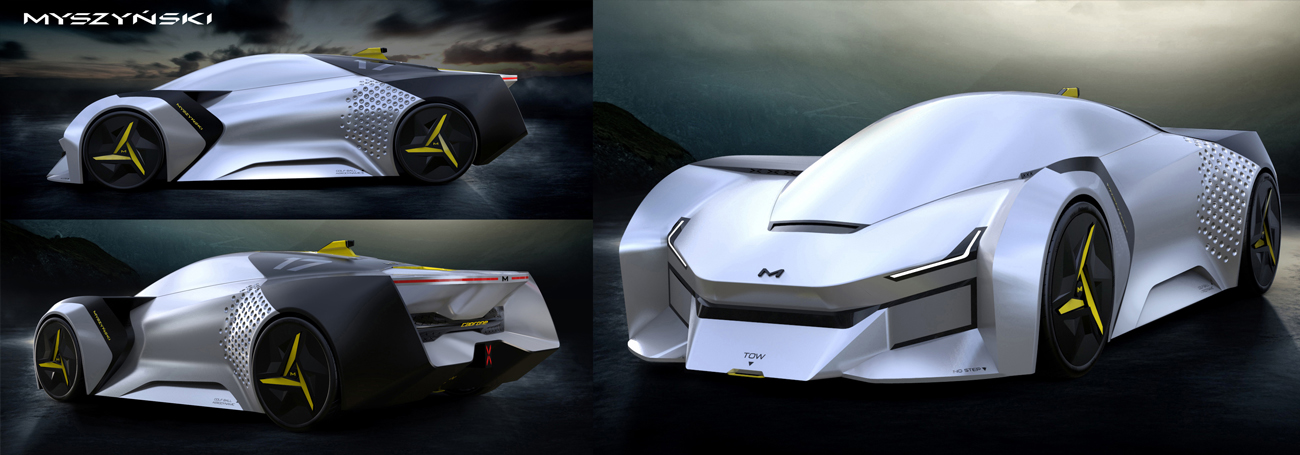
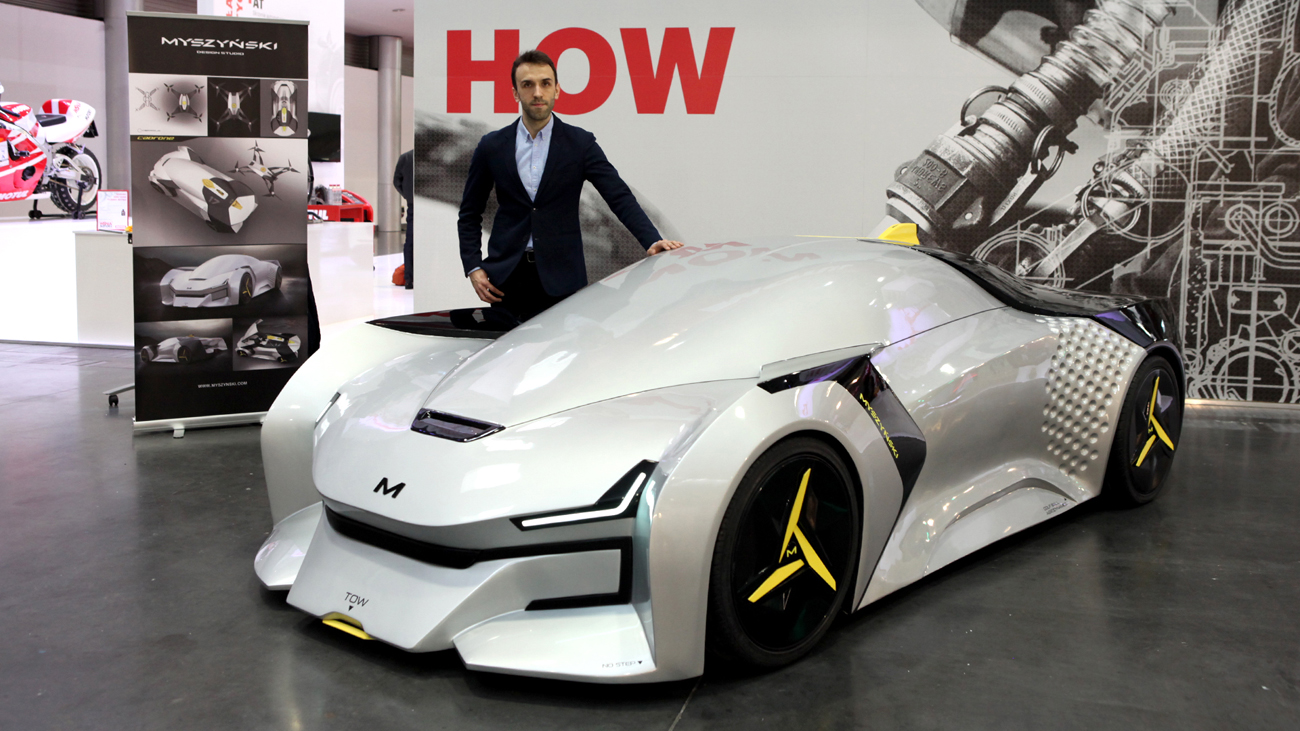
After a few days, I started to draw a car, and then I took care of modeling it in 3D. The first three-dimensional form showed me what looks good and what I should change in the project. The 3D modeling process can take a long time, depending on the amount of details and quality. At the beginning I needed a general form, which I got quite quickly, later I added details. Proportions are always very important. The car is designed for one person and is directed to the racetrack. I created a very low vehicle silhouette and looked for good graphic solutions. I really wanted to get an interesting pattern looking at the car from above. The X-shape created by the shape of the drone has become the leitmotif. On the roof I placed a GPS module and a fin with a rear view camera, which replaces the rear window. There is an air exhaust from the centrally located engine just behind it. It could be a combustion unit or a hybrid.
Click > PROJECT CADRONE – SKETCHES – 3D MODEL, VISUALISATIONS
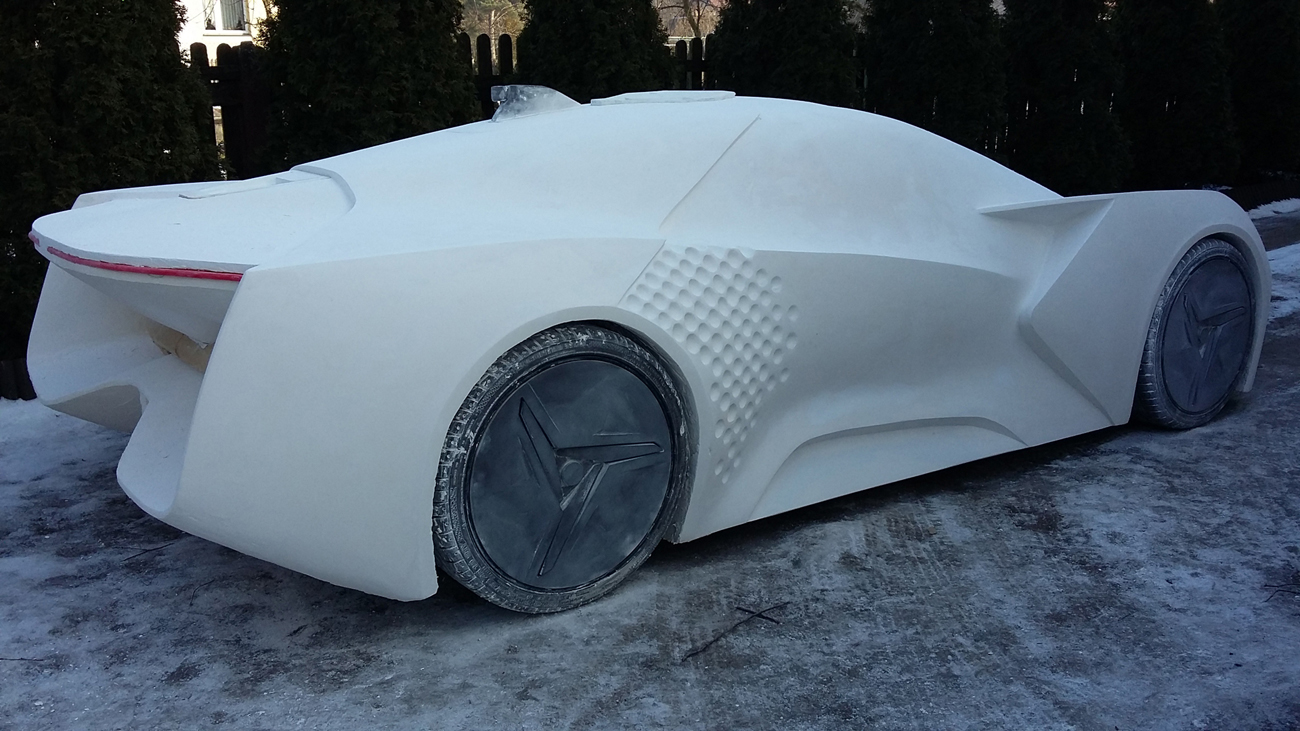
The wheels are inspired by drone rotors. On the side of the car I used the surface of the golf ball. This is the surface that improves the aerodynamics of the vehicle. Tests carried out by Mythbusters have shown that cars with wells carved in clay, which the car body has been covered, burn less fuel than without them. I decided that such a surface could help in the aerodynamics of a sports car. The front was to be pugnacious and modern. The car is set very low above the surface, which increases the sense of racing character.
September 2016
After 4 weeks I already had a 3D model with the dimensions of the car. Wheels 19 “, length 4000 mm, width 1800 mm, height 1100 mm, so I went to create the model in reality.
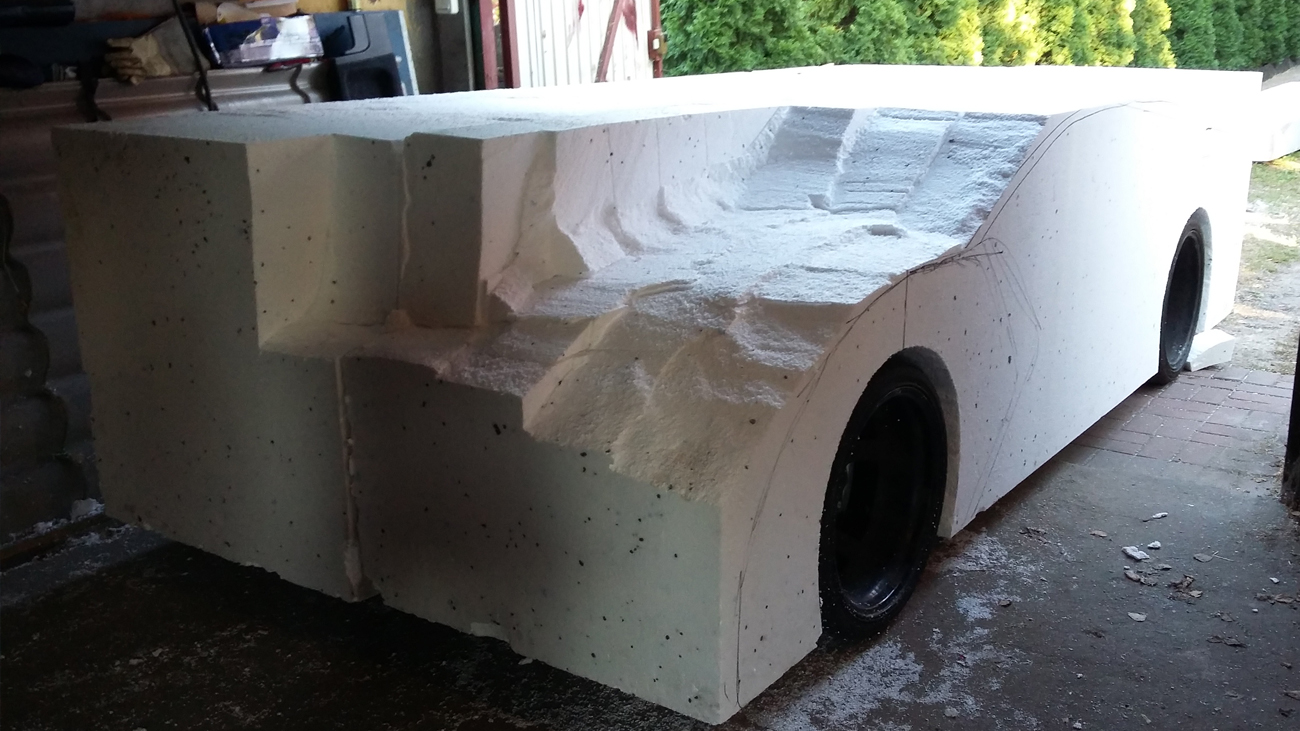
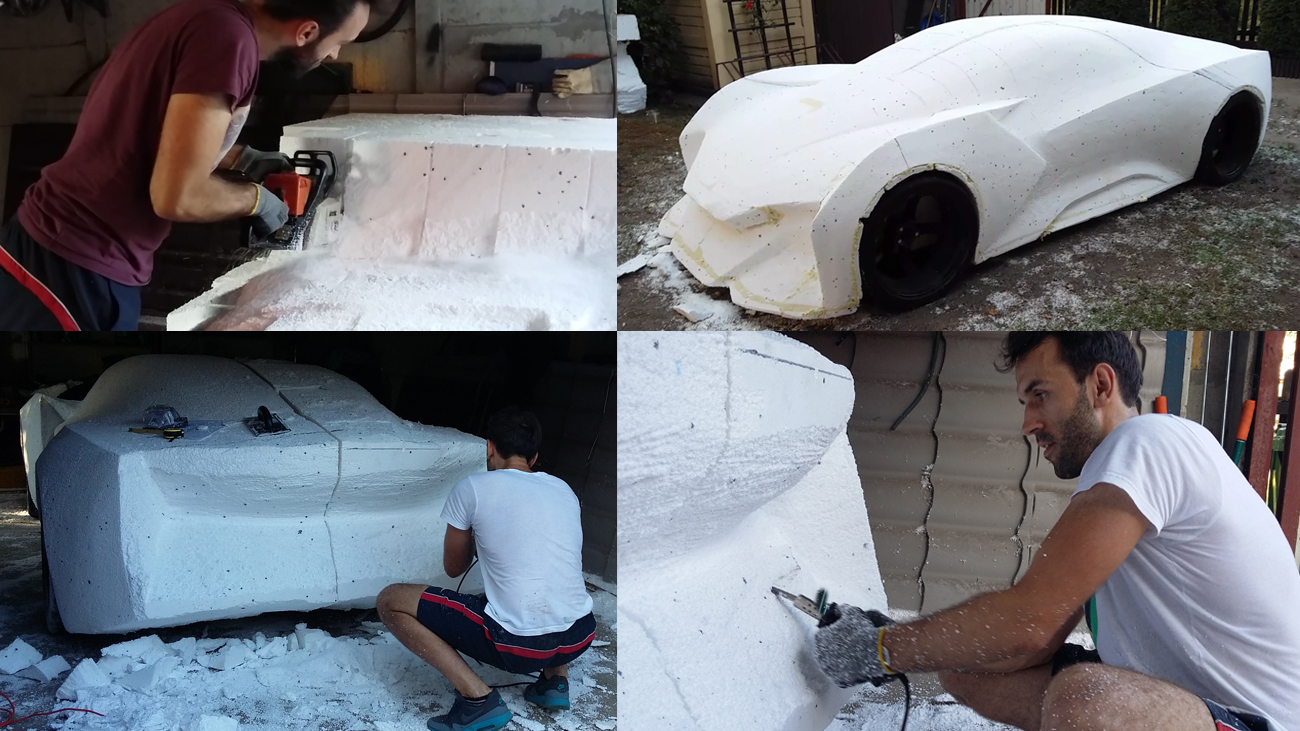
I bought wheels from the auction, I was going to mill futuristic hubcaps that would fit them. As soon as I saw the rims live, it turned out that I would have to mount them on the inside out, to be able to put on hubcaps. Then we welded the frame from the steel and attached it to the wheel axles. A platform was created on which the styrofoam block could be placed. The search for such a large block of expanded polystyrene lasted some time, but it succeeded. I ordered 2 large blocks 4 m long, 1 m wide and 1 m high. We had to connect them with glue and tighten the rod so that they would stick well. I knew that milling such a large area would be very expensive if it did not turn out to be impossible in our country. I decided to mill manually. I used a chainsaw to carve the overall shape of the car. Then I sculpted with hand saws. It went quickly and after a few days I had a silhouette reminiscent of a vehicle on wheels. I did it in the garage, and from time to time I took the car outside to see him from a distance. It was a process of constant corrections and changes.
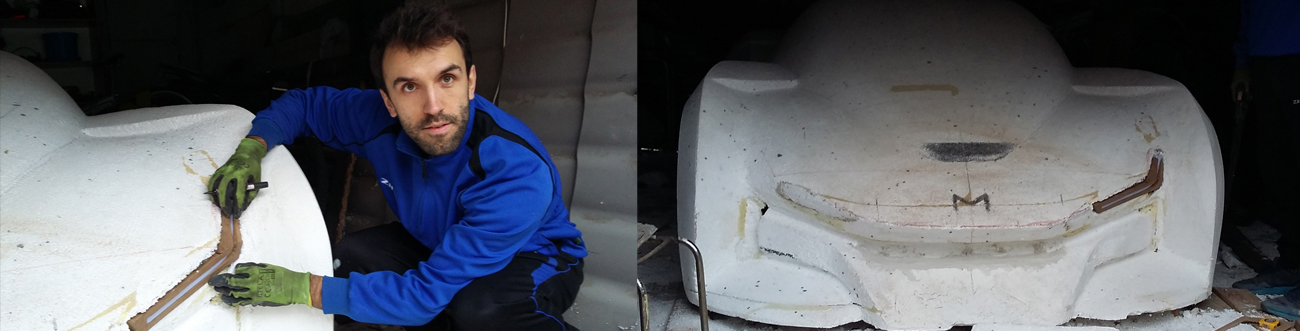
Every day I wanted this model to look better. I cut him, cut holes and put elements together. Sometimes it seemed too high, sometimes too ugly, so I kept correcting it. I used a lot of assembly foam, glue, handballs and sandpaper. In the end, I have achieved a form that satisfies me. The process of covering the surface with gypsum and fiber glass began. I also tried a resin that did not eat styrofoam, but winter was coming and low temperatures did not help me work with resin. So I used it only at key and sensitive points. I added a lot of glass nonwoven, which cemented the whole. Gypsum with fiberglass was a good material for applying and carving surfaces. I spent many weeks applying it and sculpting shapes. The sandpaper and gloves were quickly worn out. The most time was taken by the wells on the sides. First, I burned them with a hot ball, drowning styrofoam, applying a plaster and manually polishing the surface. It required a lot of patience. When I started work in September, I was hoping that the whole model would end by the end of the year.
January 2017
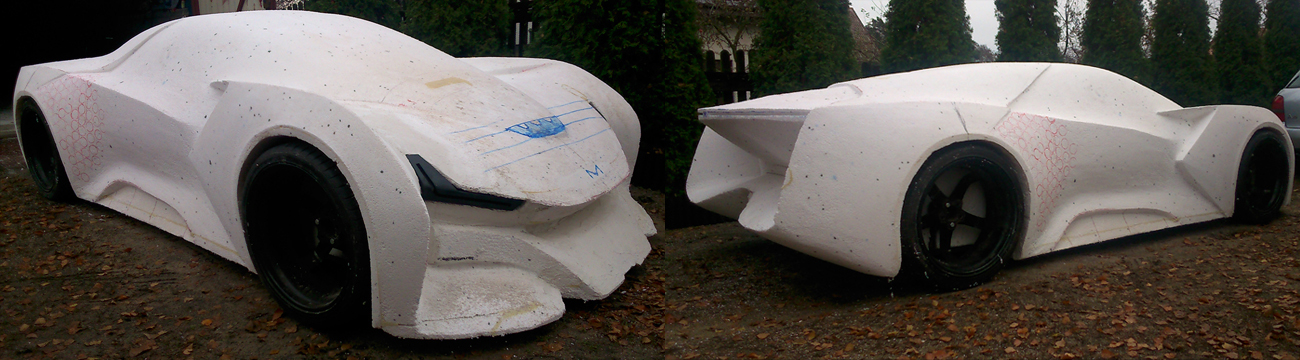
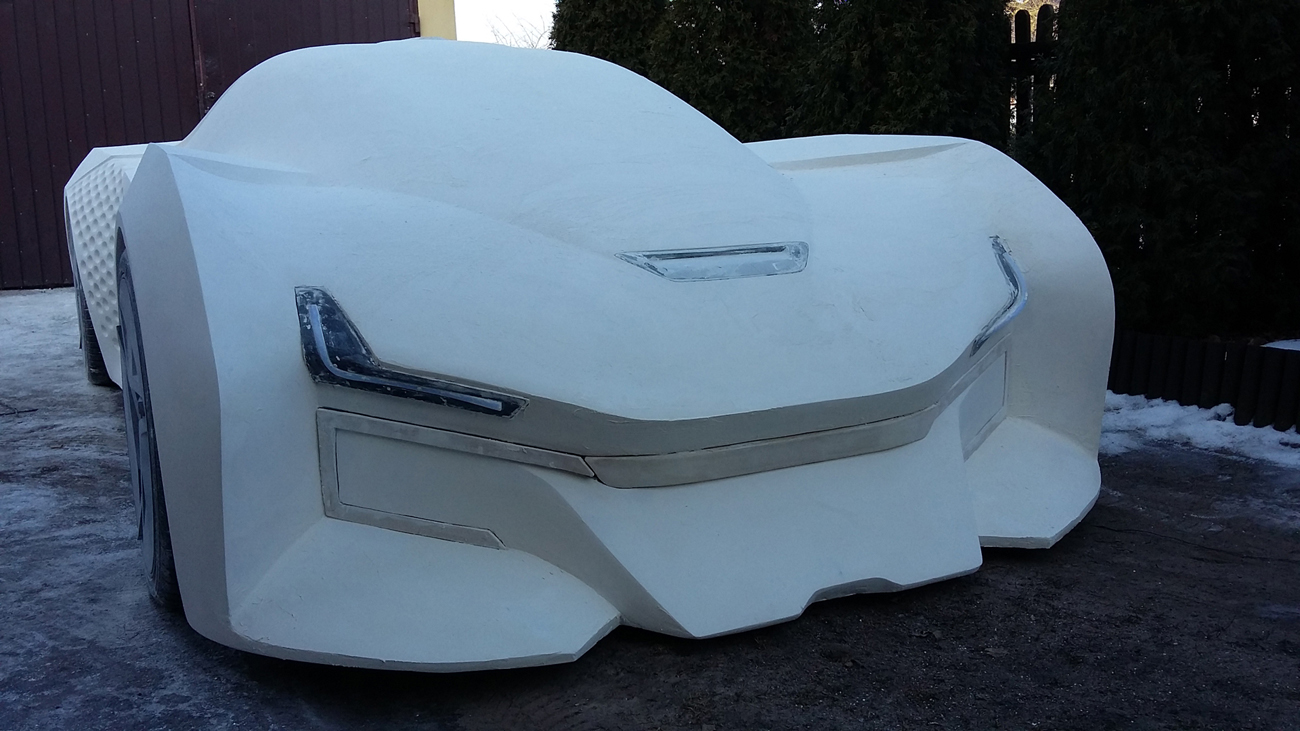
I modeled details: GPS module, fin with a camera and lamps. Attempts to print 3D these elements did not work. After the first test prints, I already knew that each element will need to be printed several times, make corrections and finally improve each shape manually. I decided that I would model them manually from the beginning. As a material, I used styrodur, plaster, spray putty and sandpaper.
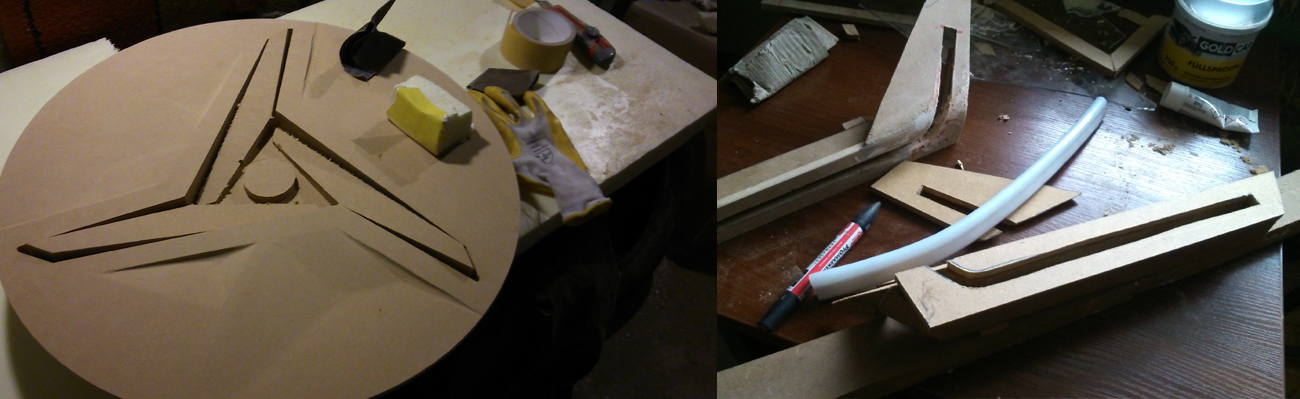
Rims and grille with X shapes mounted on the back of the vehicle I was going to mill. I found a good material that I used for that. MDF with a plate thickness of 5 cm, additionally glued two to get 10 cm. Milling at a nearby wood processing company consumed a lot of budget, but it was worth it. In mid-January, I had all the elements of the vehicle. It was enough to put everything together, sand the surfaces, paint with varnish and ready model. It took another two months. I really wanted to show it at the Motor Show in Poznań at the beginning of April. We had to make it.
March 2017
The polished model, assembled in its entirety, was ready for the refinisher to take care of it. I thought it was a way down the hill, a few days and it was ready. I have a paint shop’s neighbor, so we did not have much to transport with the model. As soon as we set out on a real street, it turned out that the vehicle was very low and any unevenness or curb could be deadly for him. Warm days were coming, the whole thing was drying up, which caused strange behavior of the structure and microcracks. We had to deal with it. The putty and sandpaper were a lifesaver, but this extended the working time. We did varnishing in several stages. Foundation, rehearsal, filling, unevenness and subsequent corrections. The painting work lasted almost a month.
April 2017
Everything was ready, just a few days before the fair, the last finishing works and sticking of the subtitles were made. I organized a car transporter that was to transport the model to the fair. 130 km distance, as if not much, but the risk of damage was high, so the voltage increased. Fortunately, the transport was very successful and on 5 April 2017 Cadrone stood in the market hall no. 7 at the Poznań International Fair.
Click for > MORE PHOTOS OF THE CONCEPT